Welcome to latakoo
These tutorials will get you up and running on the latakoo system in just a few minutes. Or watch one of our recorded training sessions.
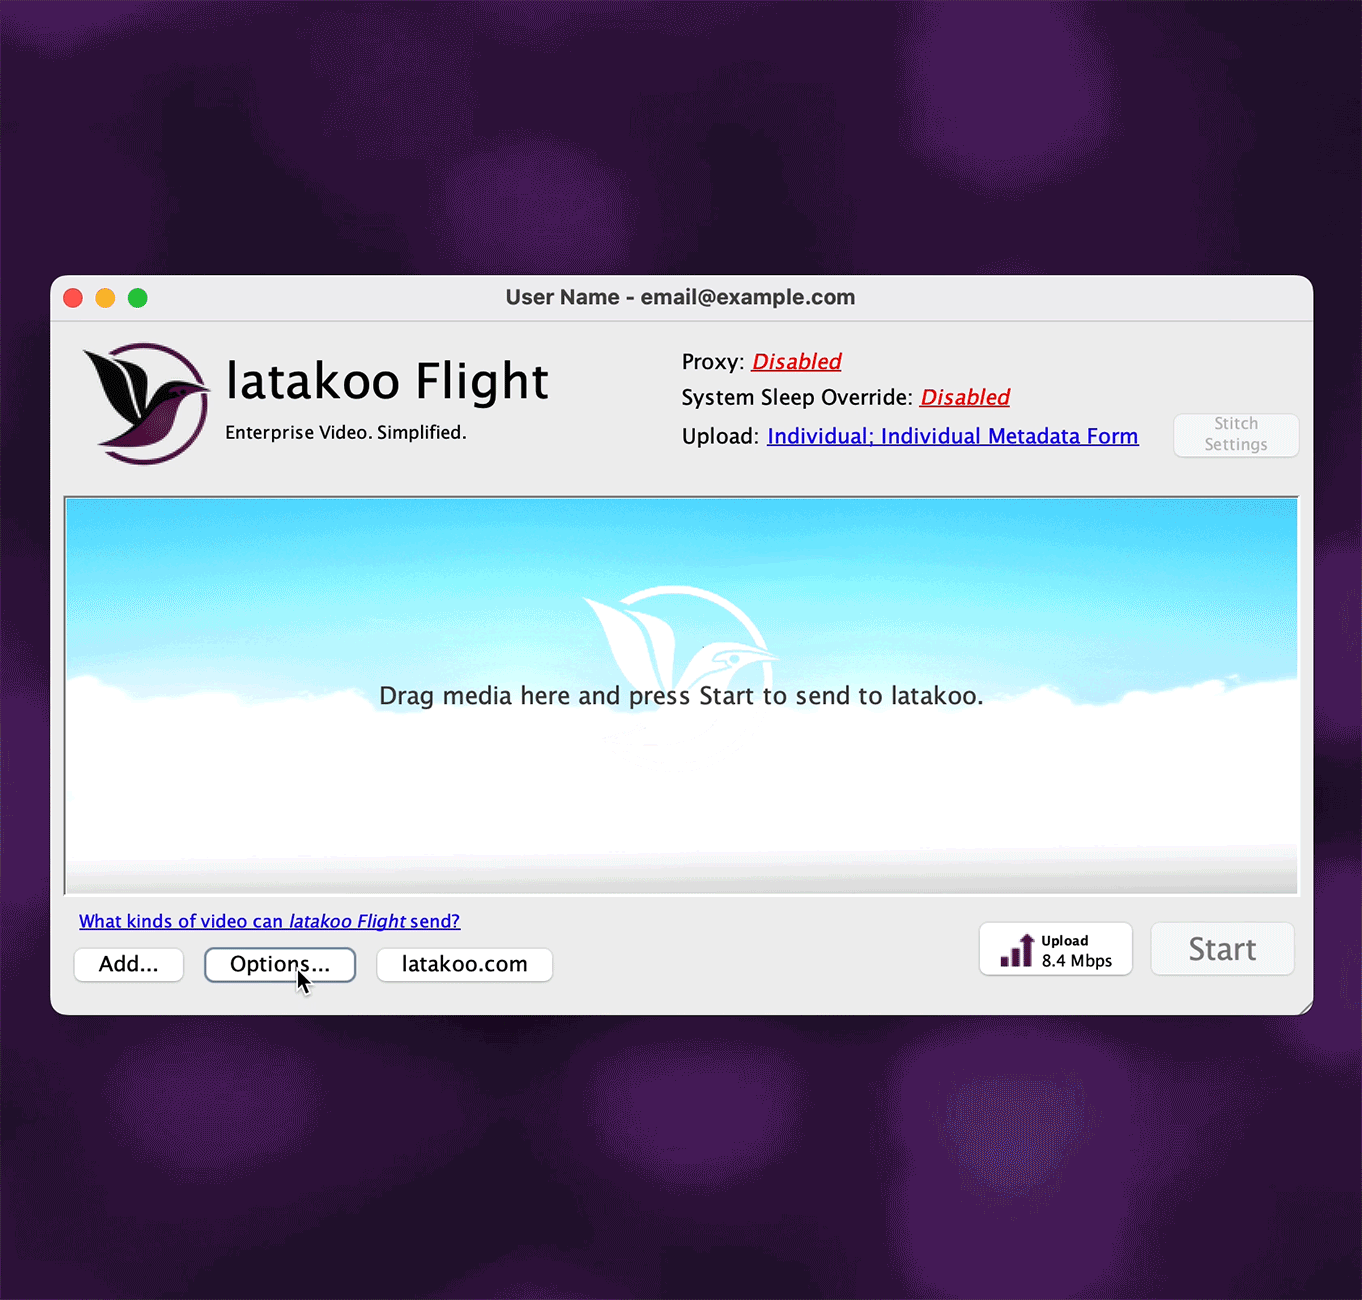
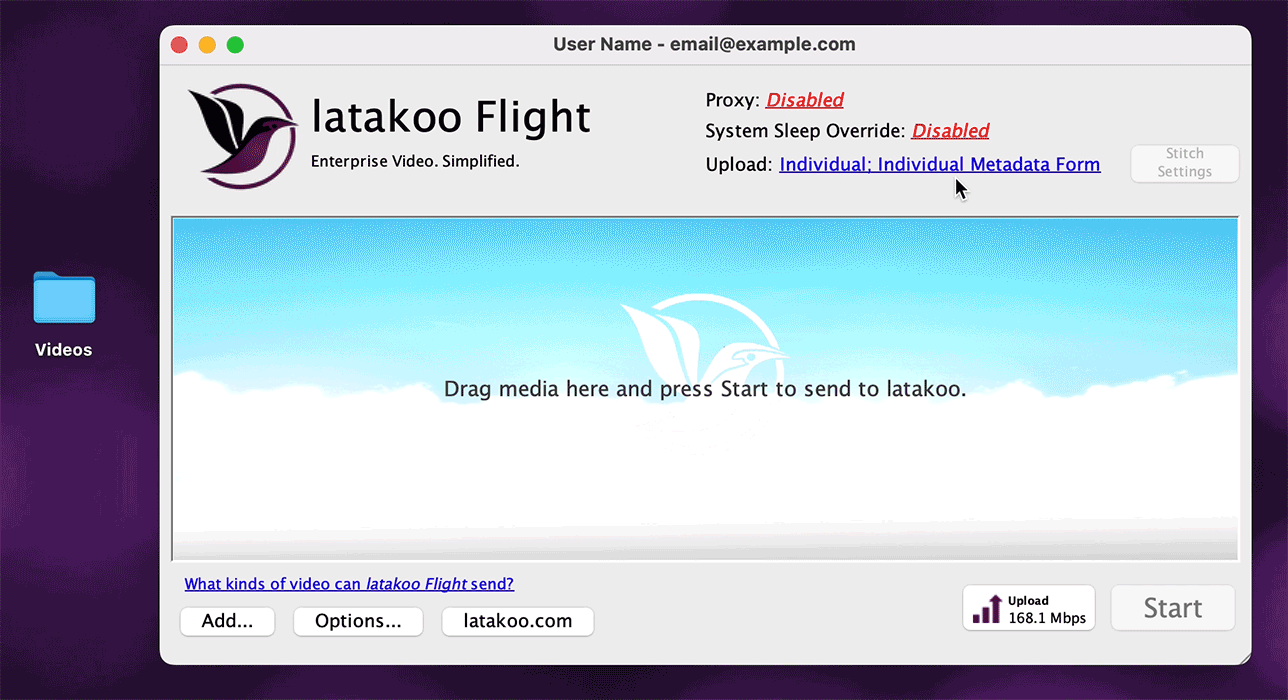
Drag, Drop, Send.
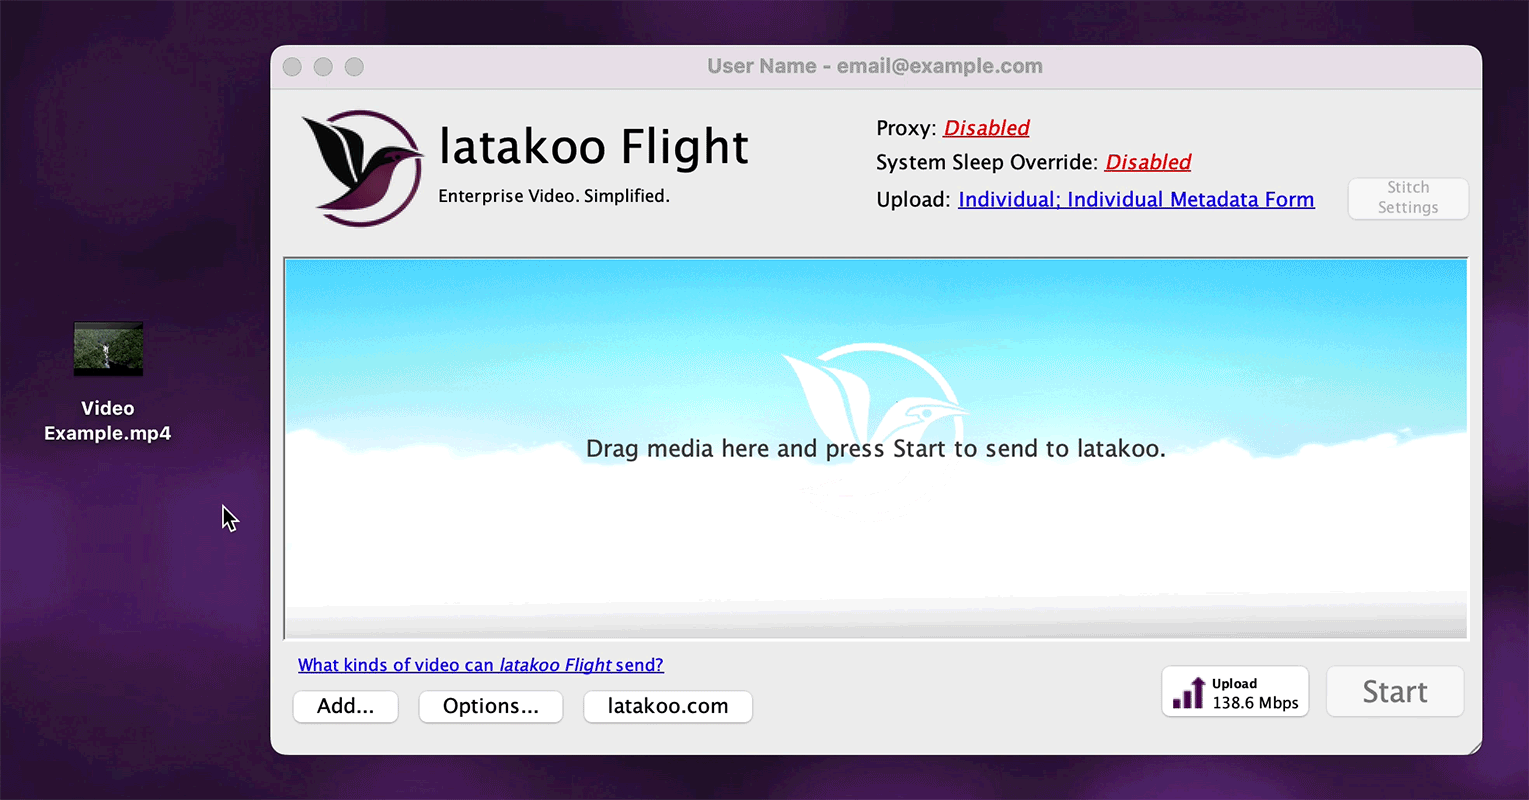
Once the latakoo Flight app is installed on your computer, open the application and log in with your credentials. Then, simply drag a file into the window.
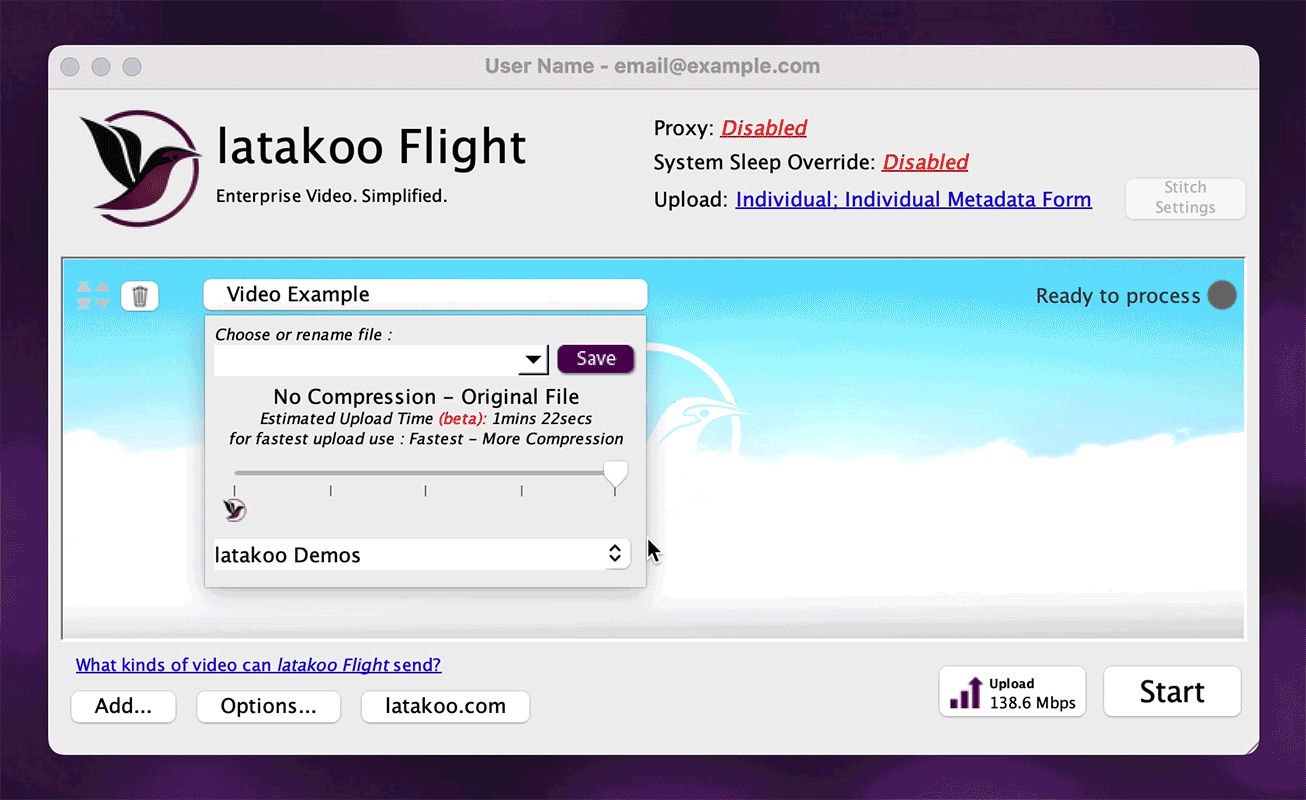
Rename Your File
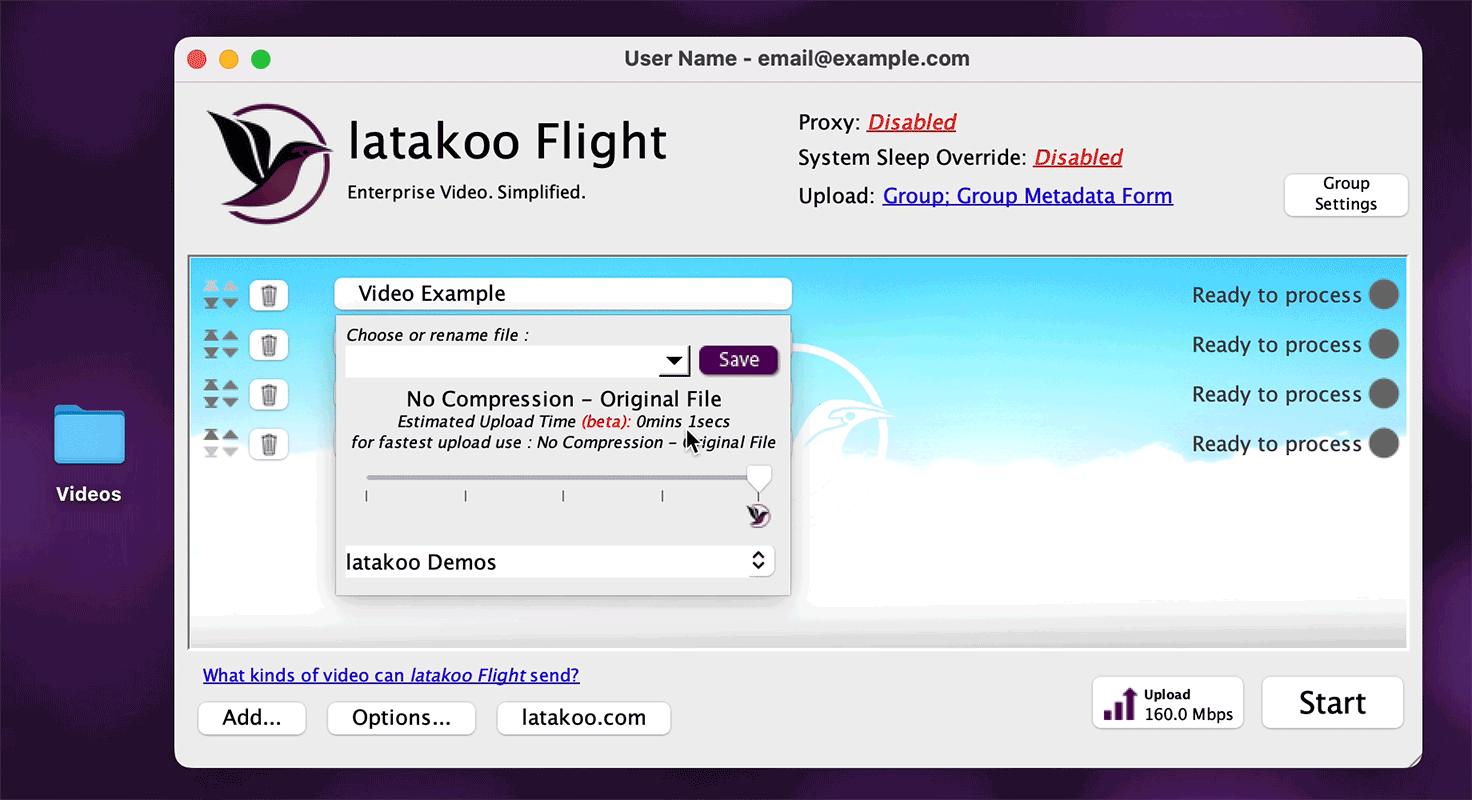
Type in a new name of your file. Hit save to apply the new name.

Quality Slider
Select the quality of the file you want to send with the latakoo quality slider. Further to the left is more compression for a very fast upload. Further to the right is less compression for a fast upload with higher quality. All the way to the right is no compression, to upload the original file.
Notice that the estimated upload time changes, depending on the quality selected. That is our application using machine learning to estimate the time it will take to upload your file. The app requires at least 20 uploads in order to begin providing the estimates to you. This allows you to select the highest quality for the time you have.
Note: you may have different quality settings than shown here.

Select the Destination
This drop down shows all of the networks (or folders) that you have upload access to. This is where your video will be stored and where other users in your organization can find your files on latakoo.com. You can upload to multiple networks at once.
Different networks have different jobs. Typically, your organization’s main network will be attached to an automated ingest workflow with latakoo HUB. You may also have a network that automates transfers to a website CMS. Check with your management team or latakoo support for your specific workflows.
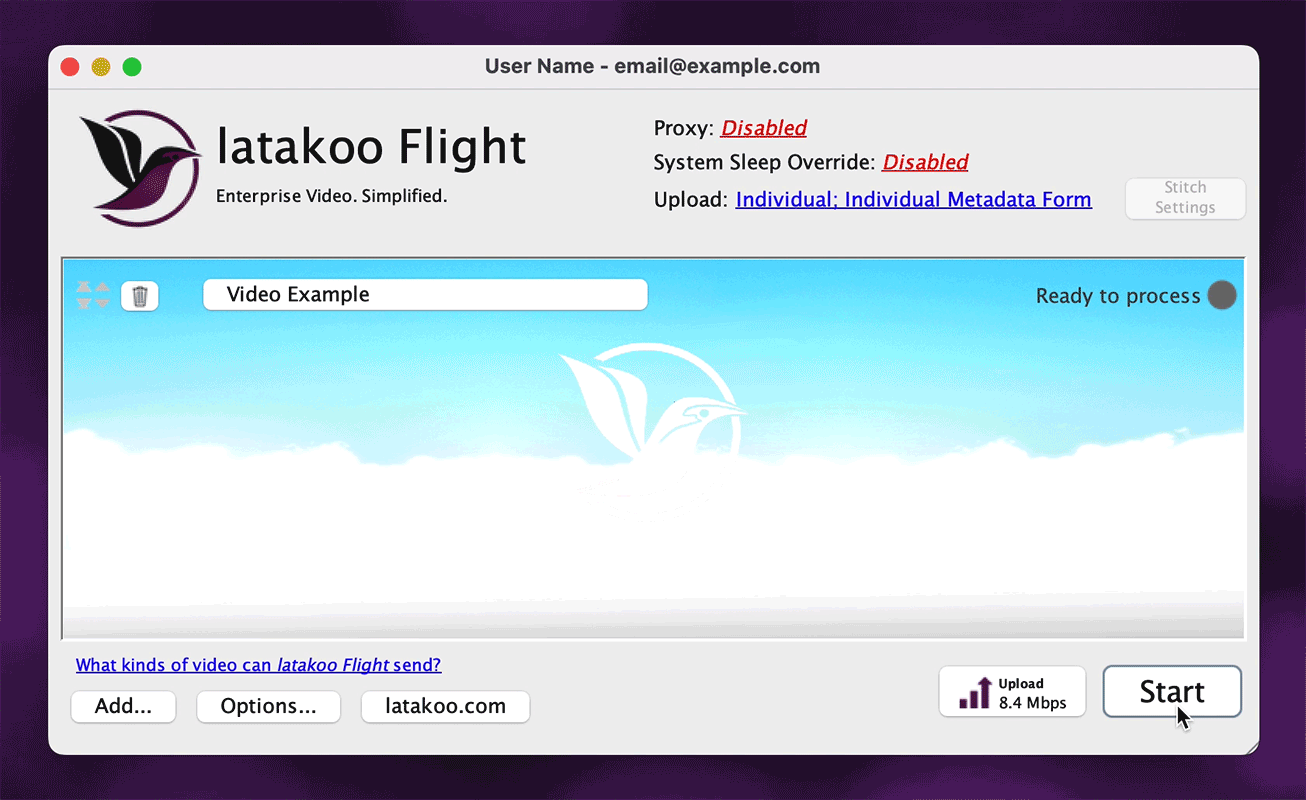
Click Start
Once you click start, the file will be encoded (if you have selected a compression setting) and sent to the latakoo cloud in the network(s) you selected. Once you set your default settings, you can send files quickly with those defaults.
If your organization uses the metadata form, it will pop up after you click send. Add script, tags and more, depending on your organization’s settings.
Set Defaults
It’s a good idea to set your default upload settings in the latakoo Flight app.
First, click options. On the general tab, select your default quality settings for upload.
Then, select the default upload network(s) for your uploads. This is typically your main ingest network. Additional networks can be added.
Finally, select your default download folder. This is where your files downloaded with the Flight app will be saved on your computer.
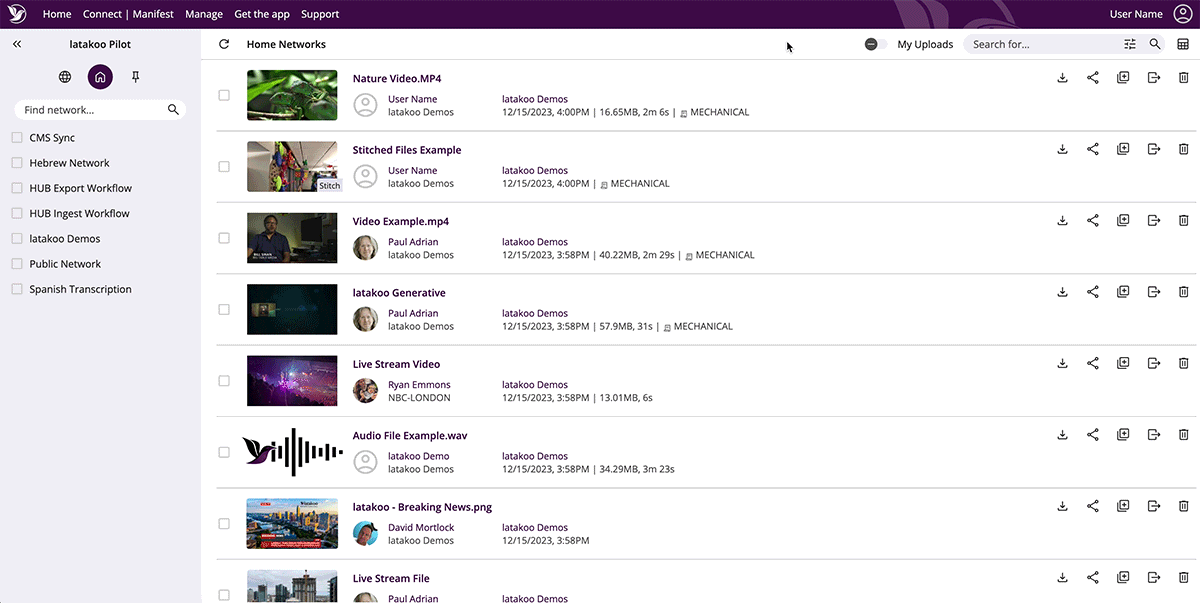
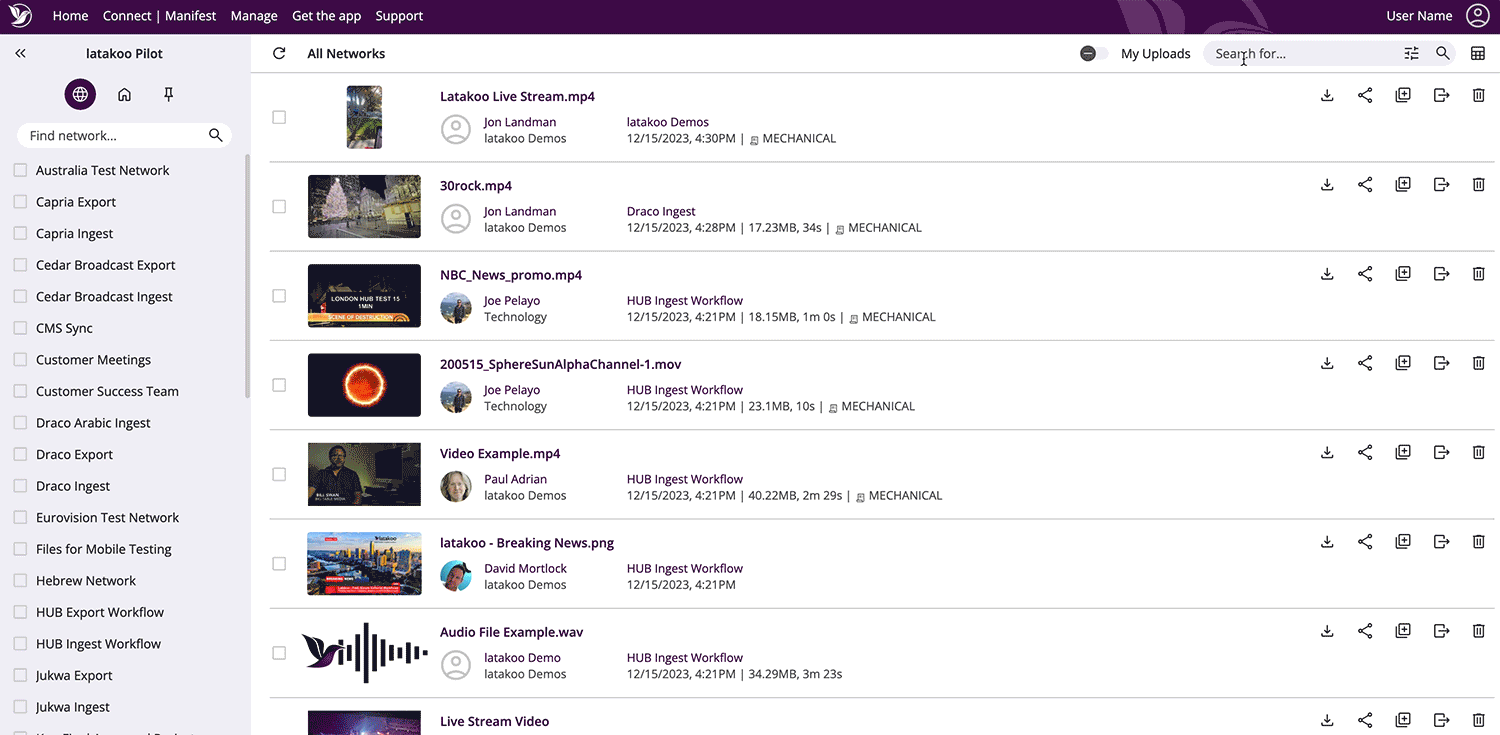
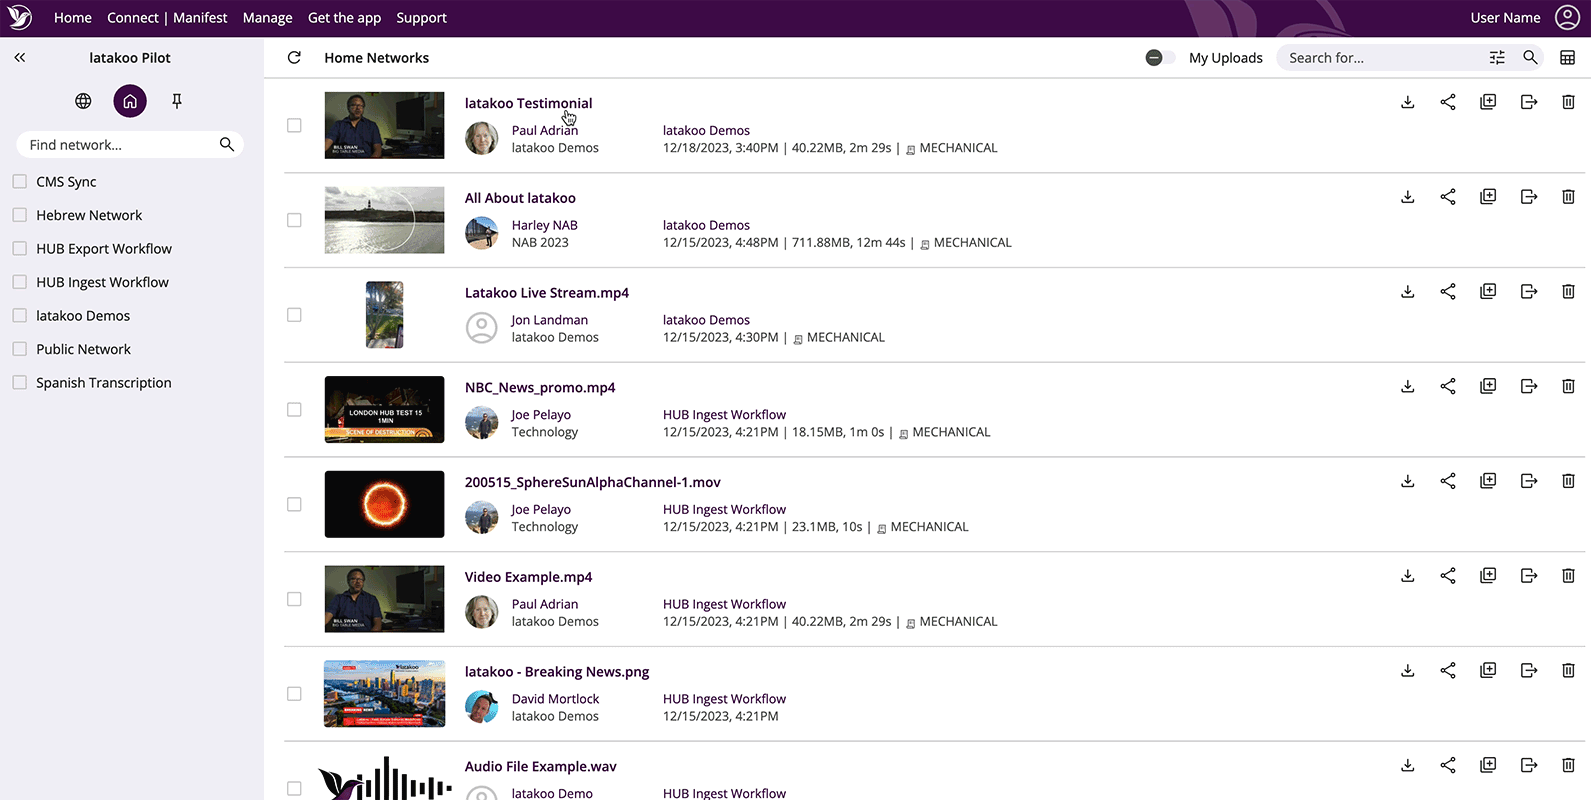
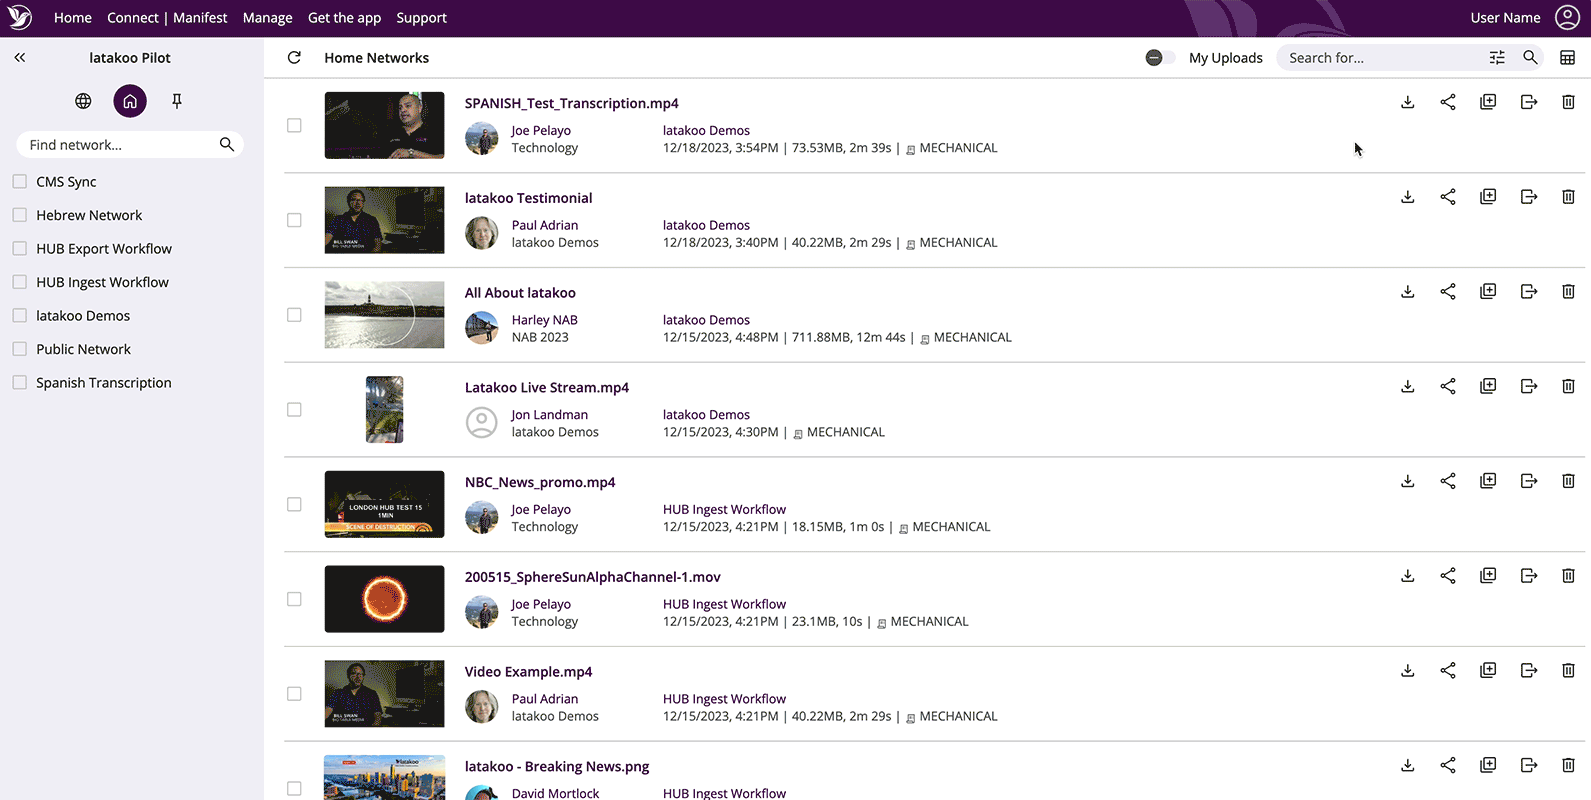
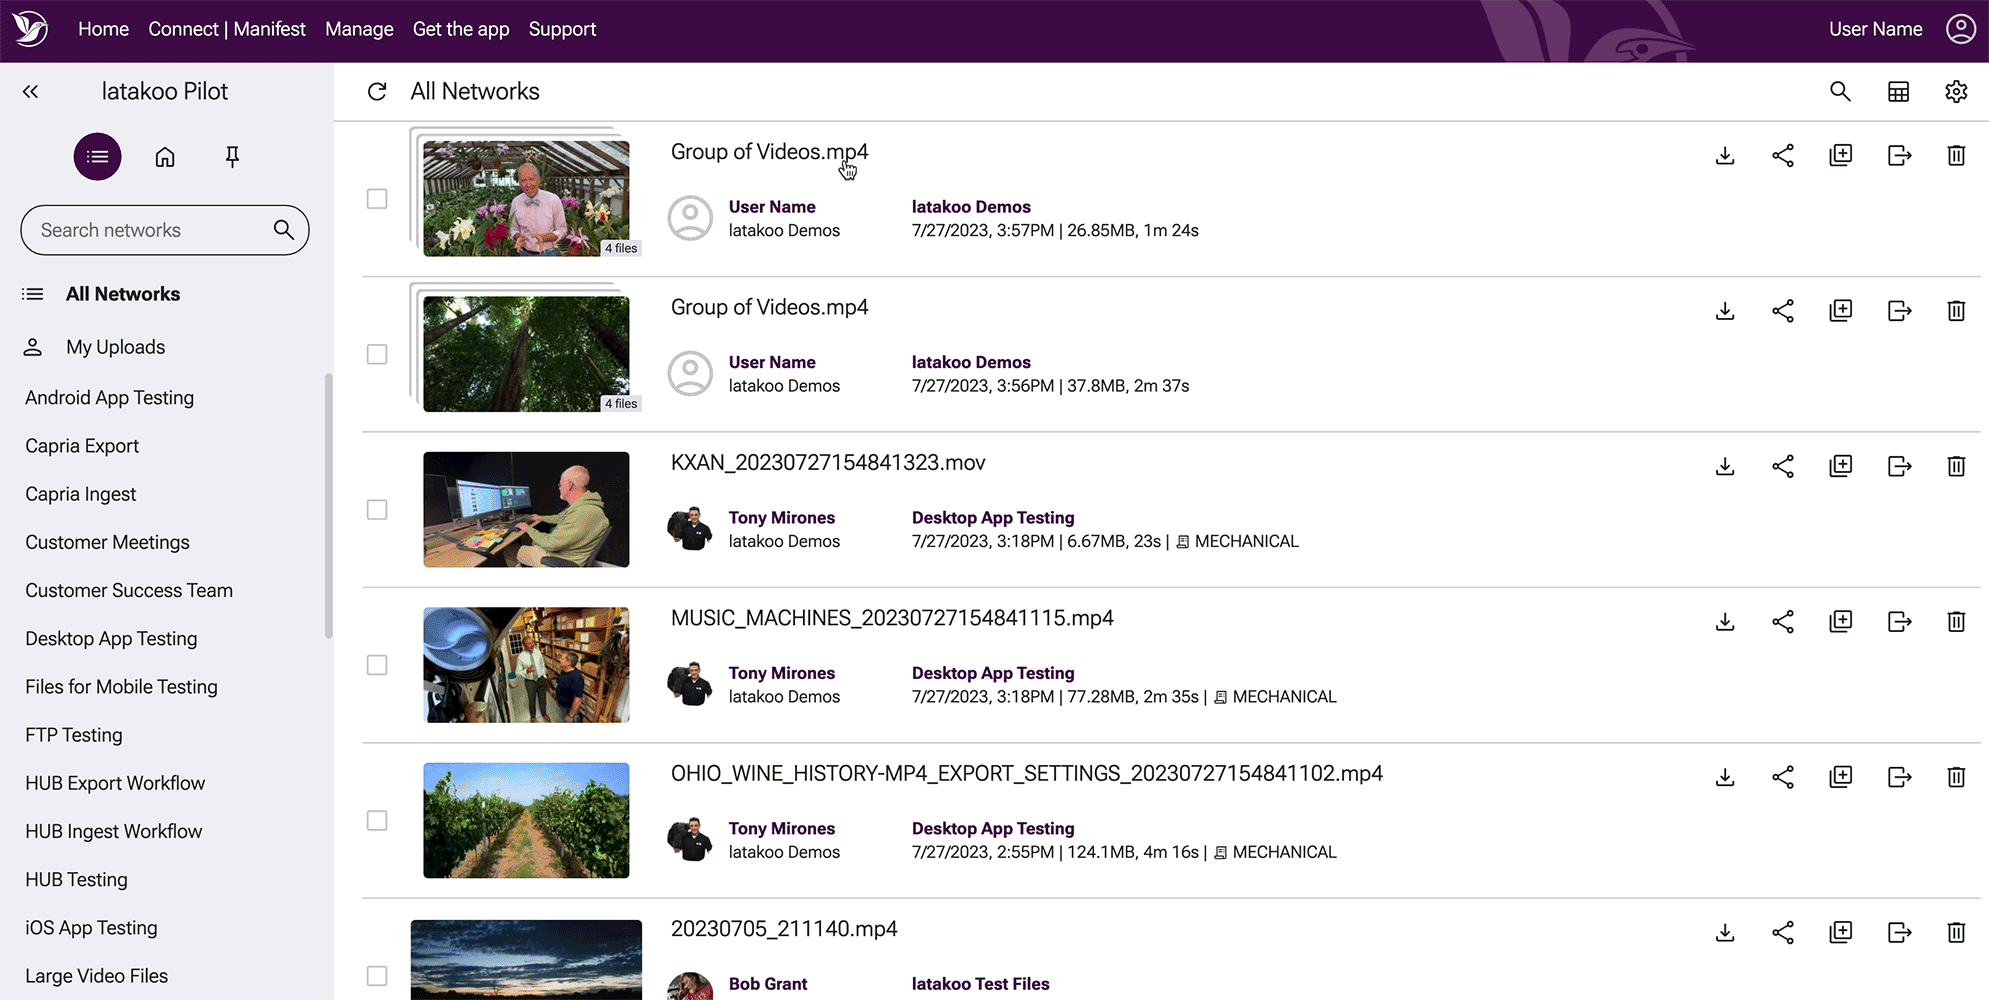
latakoo Pilot: Your Custom Content Feed
After logging in to latakoo.com, you’re immediately placed into your latakoo Pilot content feed. On the left is a list of content networks (or folders) that you have permission to access.
“My uploads” is a shortcut to locating your uploaded files. Narrow the list of displayed networks, by using the filtering option.
Some networks are for sharing, some for automated ingest, some for automated file transfer. Check with your manager for specific guidance.
Different Views
Use the three buttons at the top of the network list to toggle between views.
The left button is the All Network view. If selected, you will see all networks that you have access to in the network list on the left hand side.
The middle button is the Home Networks view. If selected, you will only see networks within your home organization (that you have access to) in the network list. Your content feed will only be from these networks.
The right button is the Pinned Networks view. If selected, you will only see networks that you have chosen to see under your settings. This is your own customized view of the Pilot feed.

Locating Files
To search for a file, type in a keyword in the search bar and hit enter. The system will search for the keyword in any file names, user names, associated Metadata and transcription.
For a more advanced search, simply click the advanced search icon. Now, you can enter a specific date rate and search by specific user(s) along with your key word.
From the latakoo Pilot feed, you can also click on a user’s name to filter to their content. The same functionality works for network names as well.
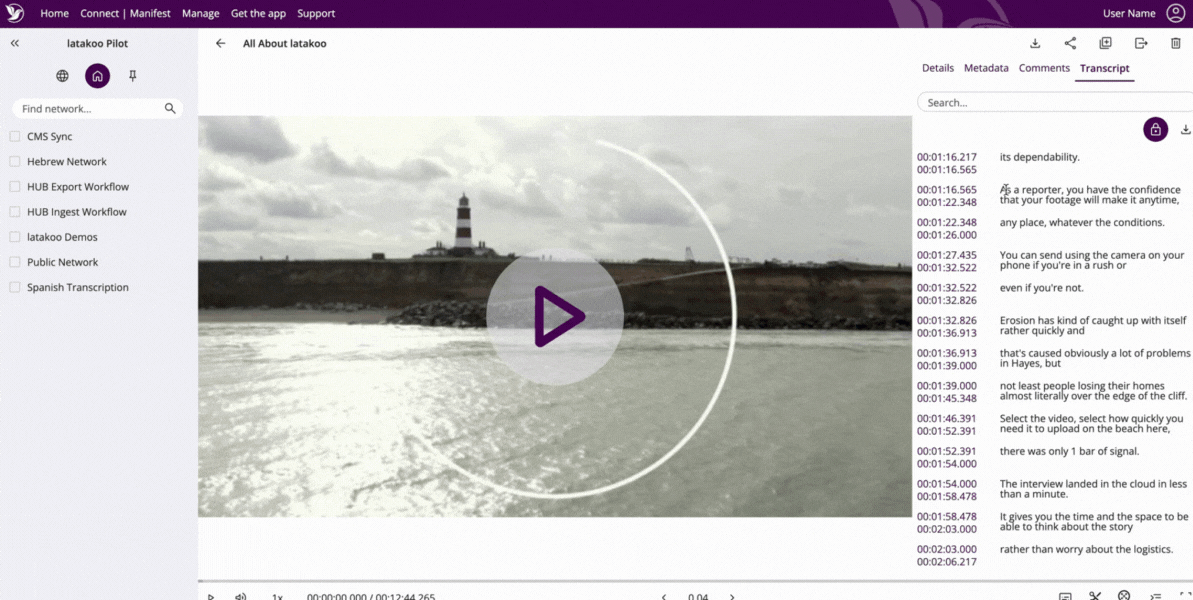
View a File
Click the thumbnail or filename to open a file. Play the video, open in full screen mode and see details about your upload.
To the right of the video player is the file’s information, Metadata, transcription (if subscribed) and comments.
You can use the latakoo clip editing tool to quickly create a new clip from any file in Pilot. You can also edit the metadata for the file here, if you have permission to do so.
Edit a File
You can use the latakoo clip editing tool to quickly create new clips from any existing file in latakoo Pilot, even from incoming live streams.
You can use transcription to set your in and out points, give the new clip a name and select where the file will be sent. If you send it to a network attached to a HUB workflow, the new clip will automatically get ingested in your asset manager.
No transcription? No problem. Simply use the timeline to set your exact in and out points for the new clip.
Downloading a File
There are a couple of ways to download a file from latakoo Pilot. Click the download button to see all options.
If you have a latakoo HUB workflow, the first option is to download to your Asset Manager. This will trigger an automatic download via the HUB and ingest into your Asset Management system.
The second option is to download via the web. Use this option to do a straight download through your browser.
The rest of the options listed will use the latakoo Flight app to download the file. Besides downloading the default file (the file type that was uploaded), you will have the option to transcode the file to a different codec and wrapper. The latakoo Flight app gives you the ability to change the file to suit your workflow.

Sharing Files
Click the share button to see all of the sharing options.
The first option is to share via email. Type in the recipient’s email address (or multiple separated by commas), add a message if desired, choose their options (allow downloads, require login, allow resharing) and click share.
The second option is to share via direct link. Set your options and click get link. Once generated, you can copy and paste the link to share the file with anyone.
The third option to to make the file embeddable and generate an iframe.
File Actions
File action buttons include copying the file to another network, moving the file to another network and deleting the file.
You will only see actions you have permission to perform. If you do not see the button, you do not have permission to perform any of these actions on that particular file.
Bulk File Actions
Any file action can also be done to multiple files at once. Use the tick boxes to select your files. This opens a selected items pane on the right hand side, so you always know what files you have selected. Use the bulk action buttons at the top of pane to select your action or clear all selected items.
You can download, copy, move or delete files in bulk (as long as you have proper permissions for the action on each file).
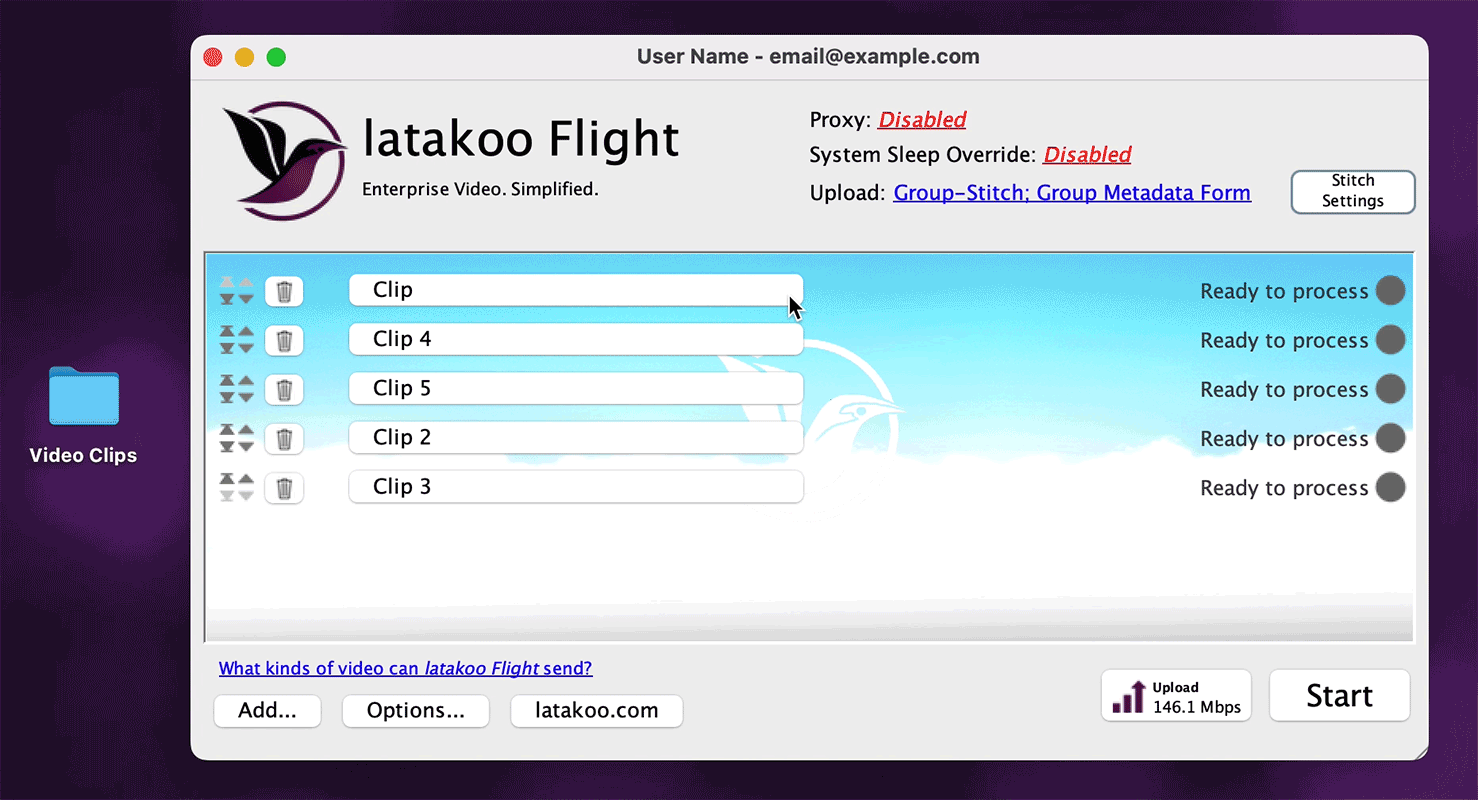
Group Uploads
When you upload a group of files they are placed in a folder inside of a network on latakoo.com. The button “Group Settings” allows you to rename the folder. The individual clips will retain their names.
latakoo can extract files from a contents folder off of your camera.
To group files, change the upload type on the latakoo Flight app. You can even drag in an entire folder like shown here.
Group Upload Quality Settings
Compression rates can be set for each file. Audio files will automatically default to uncompressed.
After clicking Start, you’ll see a “G” icon indicating that the files are being grouped.
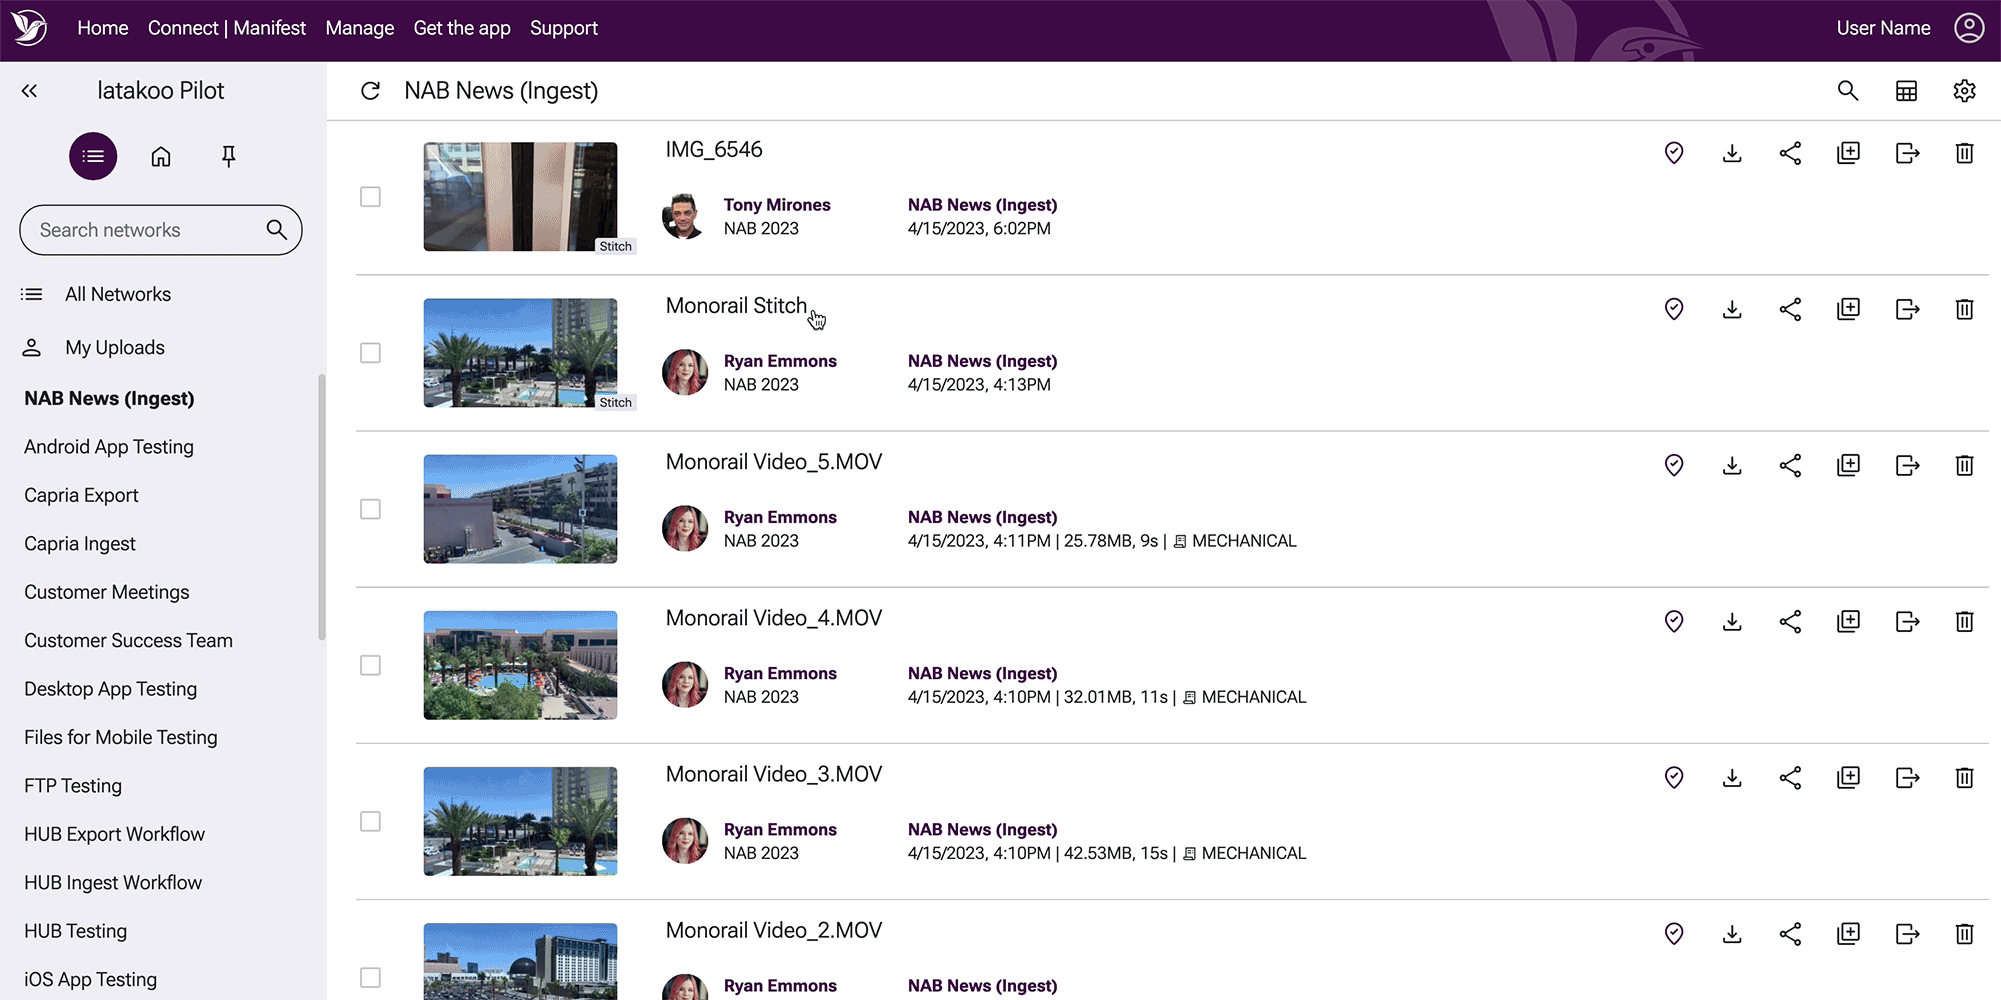
View and Download Groups
On latakoo.com, you can view the group of files by clicking the thumbnail or group filename. The individual files in the group will appear on the left hand side. Click on any file to view it.
Entire groups of files can be downloaded with the latakoo Flight app. Once downloaded they will be in a folder on your local machine. You can set the default download location in the latakoo Flight app. You can also download the individual pieces of the group via the web or desktop app.
Stitch Uploads
To stitch individual files into one continuous file, click on the upload type and choose Group Stitch. The button “Stitch Settings” allows you to rename the new stitched file.
latakoo can extract files from a contents folder off of your camera.
Best practices: only stitch like files with like (same frame rate, same raster size) and send no more than 10-15 files at a time.
Stitch Upload Quality Settings
Set the compression rate. When you stitch files together, they must compressed at the same setting. Whatever quality selection you make for one, applies to all.
After clicking start, you’ll see an “S” icon to indicate the files are being stitched.
View and Download Stitched Files
In latakoo Pilot, you can view the complete file, stitched together, by clicking the thumbnail or filename. The individual pieces of the stitch will be on the left hand side. You can view an individual clip by clicking on it.
Stitches take time to fully render in latakoo Pilot, due to the time it takes to generate the complete, continuous file.
Once the stitch is complete, you can download it as you would any other individual file. The individual pieces of the stitch can also be downloaded.
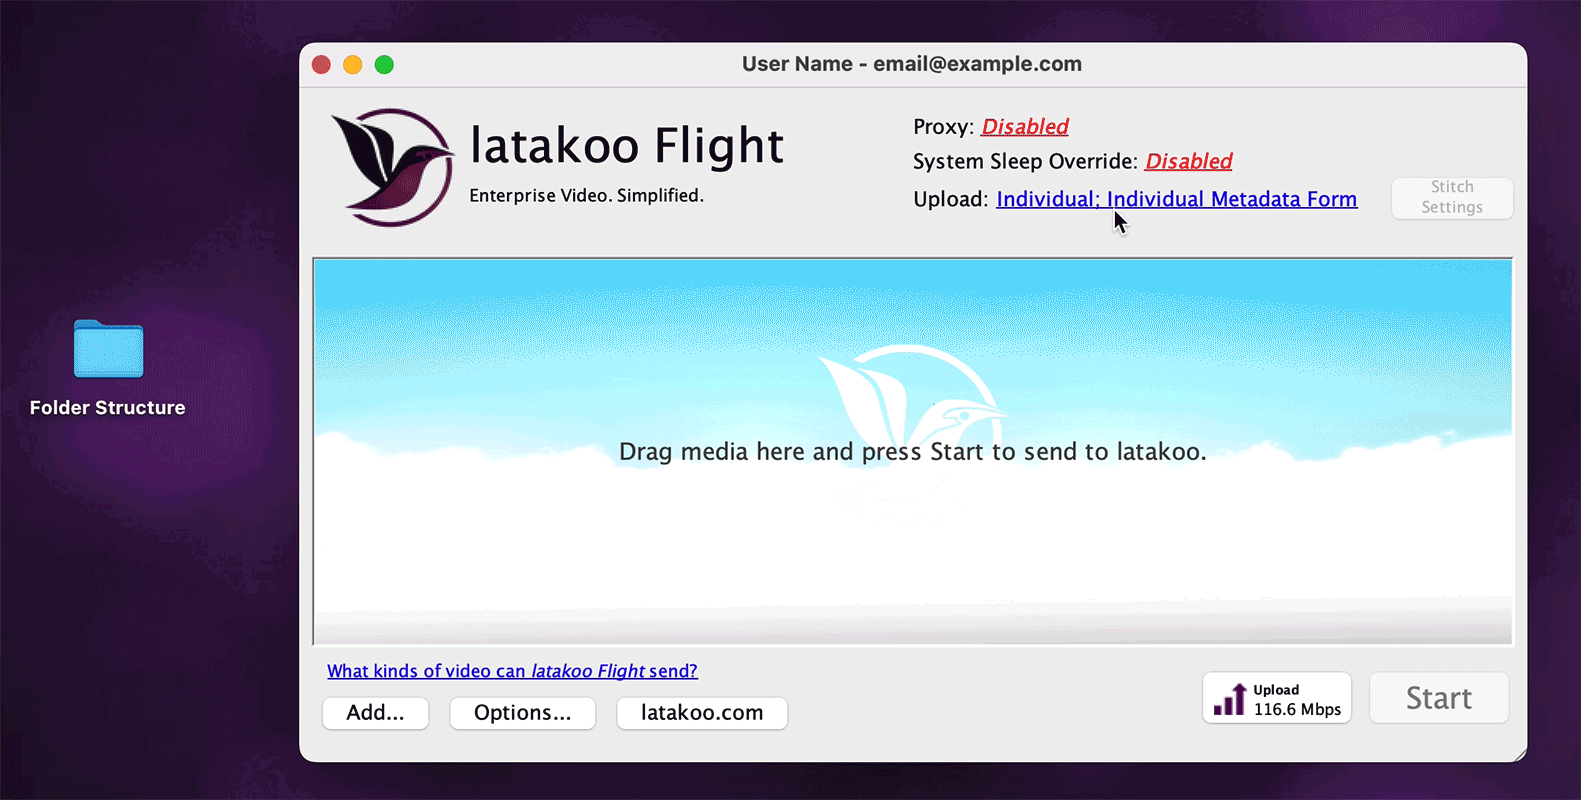
Maintain Folder Structure Uploads
To upload an entire folder exactly as it exists on your machine, including all files and sub-folders, change the upload method to Maintain Folder Structure.
Drag your entire folder into that app, rename the folder if you would like, and click Start.
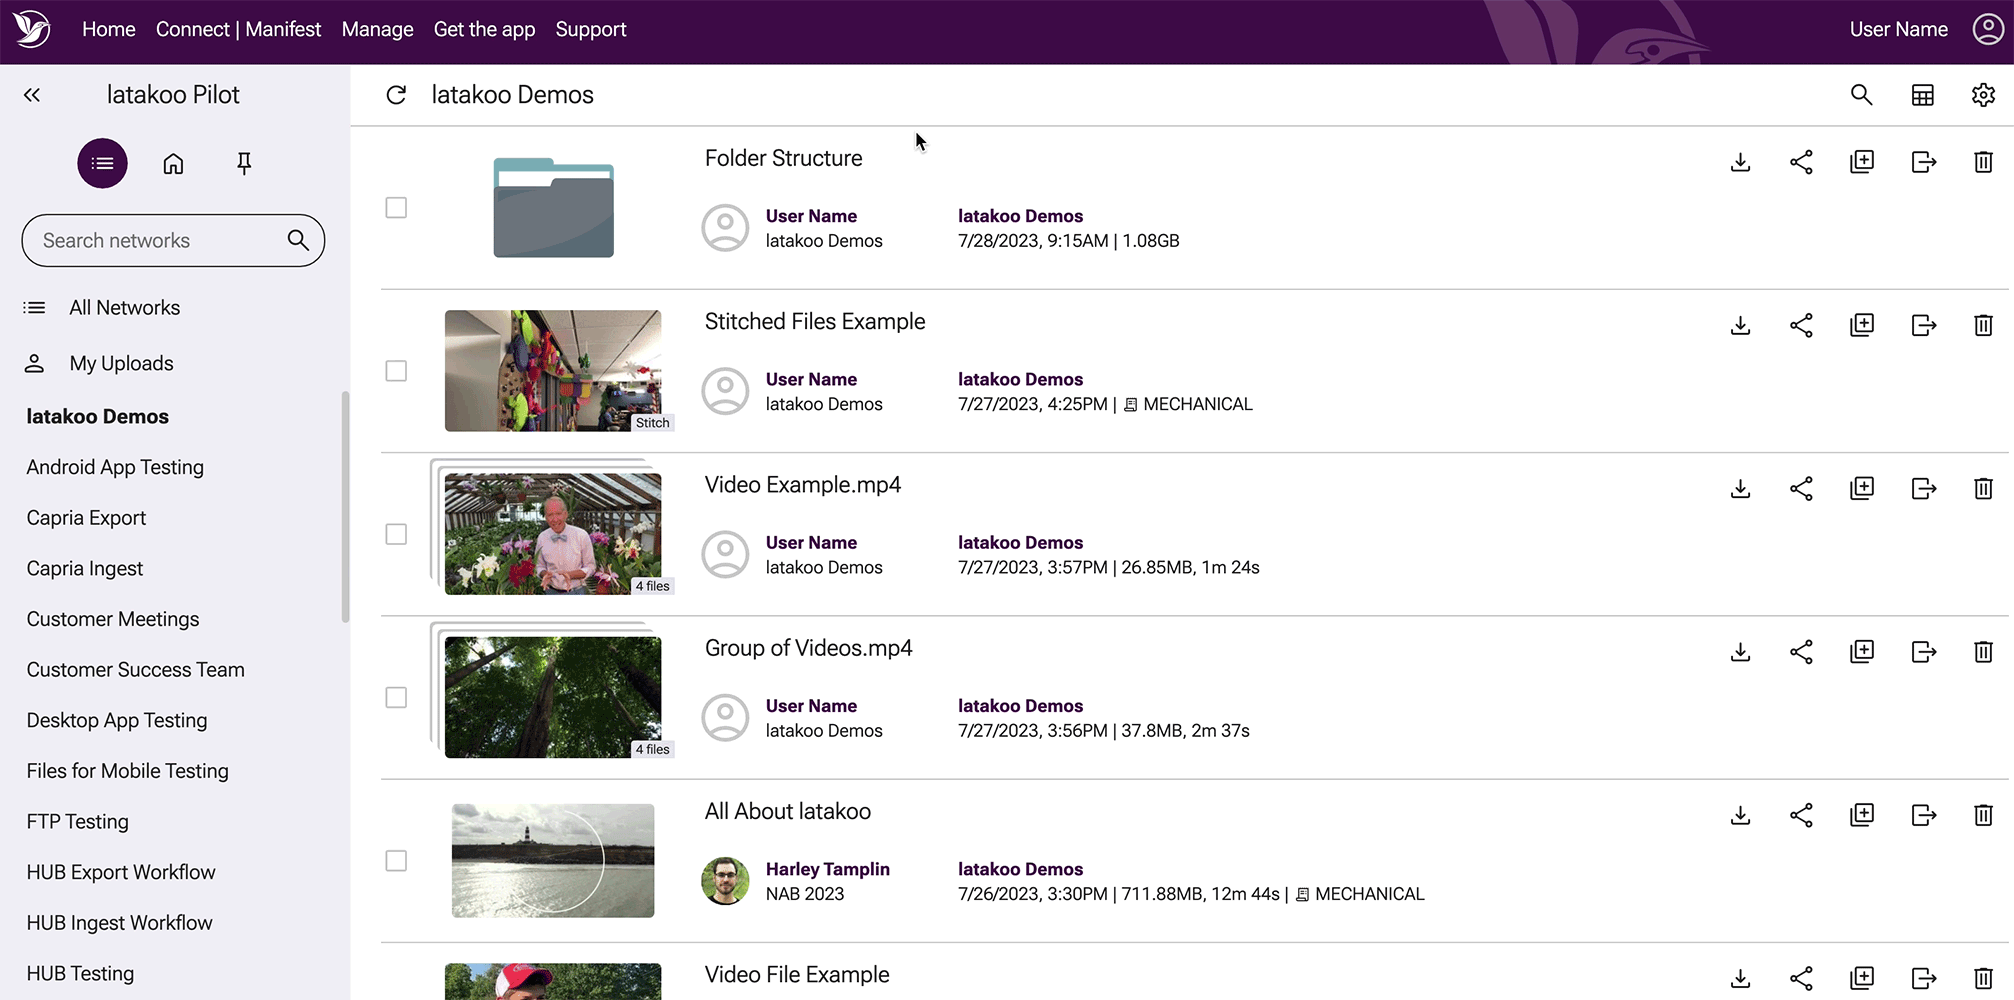
View and Download Folder Structures
In latakoo Pilot, you can view the structure and content of the folder by clicking the thumbnail or filename. You cannot view or play the individual files, but you can see the file names, sub-folders, and structure of the entire folder.
You can download the entire folder using the latakoo Flight app.
latakoo Flight App for Mobile
The latakoo Flight app for Mobile is currently available on iOS and Android devices. Go to the store and search latakoo Flight Mobile.
The latakoo Flight for Mobile app works similarly to the desktop app, allowing you to choose video, images or audio files from your phone to upload, select the compression rates and add metadata.
Log in with the same credentials you set up on latakoo.com.
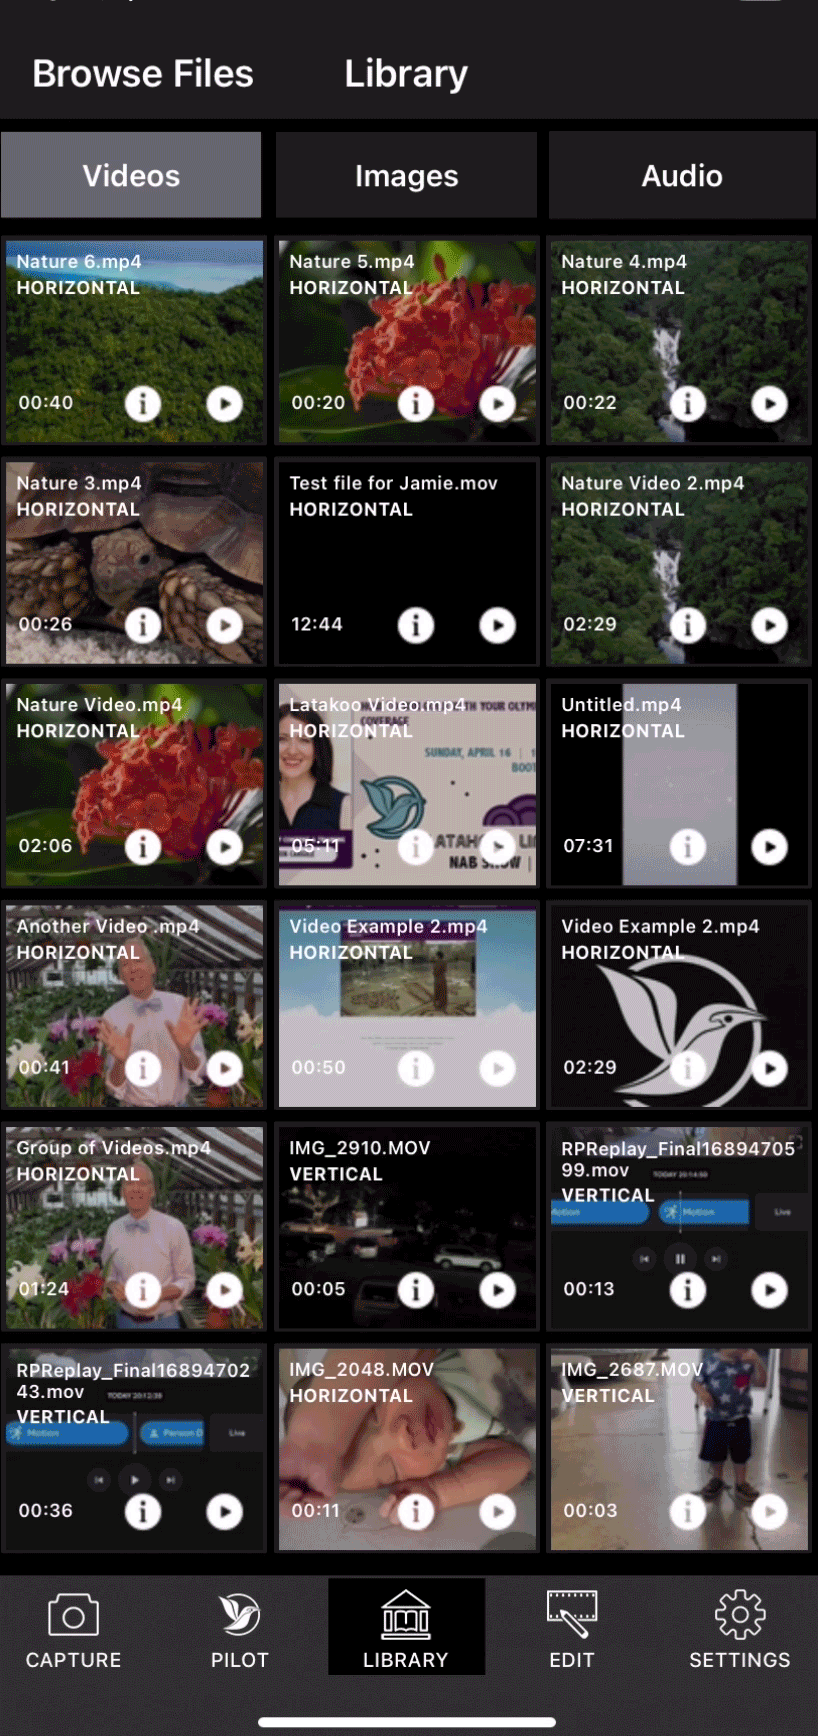
Sending Files with the Mobile App
You can shoot video, capture photos, record audio tracks or live stream within the app, by clicking on the camera icon.
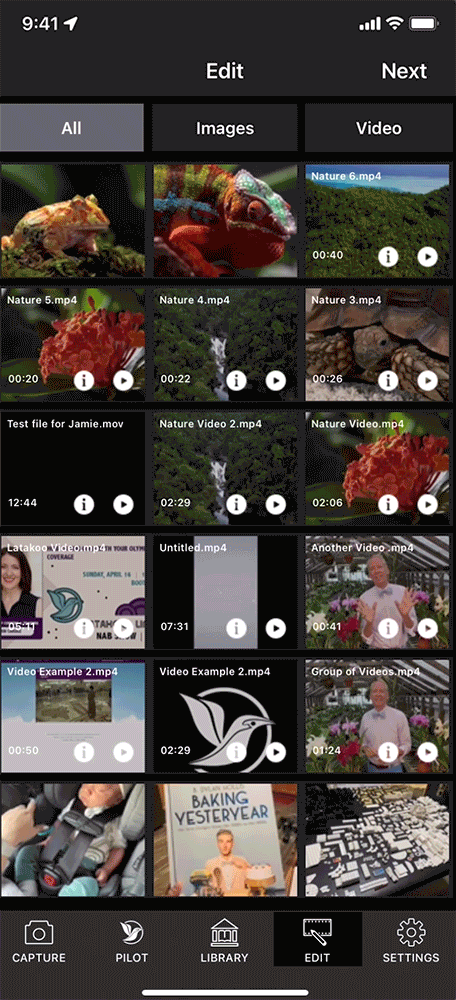
Or, you can select library and upload an existing file. Select the file, update the tile, select the upload quality and select the destination network. Click Send at the top of the app.
You can also select multiple clips, photos or audio files to send to the cloud. You can choose to send the multiple files as individual files, as a group or as a single Stitched file (for video and audio only). If you select Stitch, make sure they are all the same type of file – shot in the same quality and the same orientation (for video).
The metadata form will load, just like the desktop app.
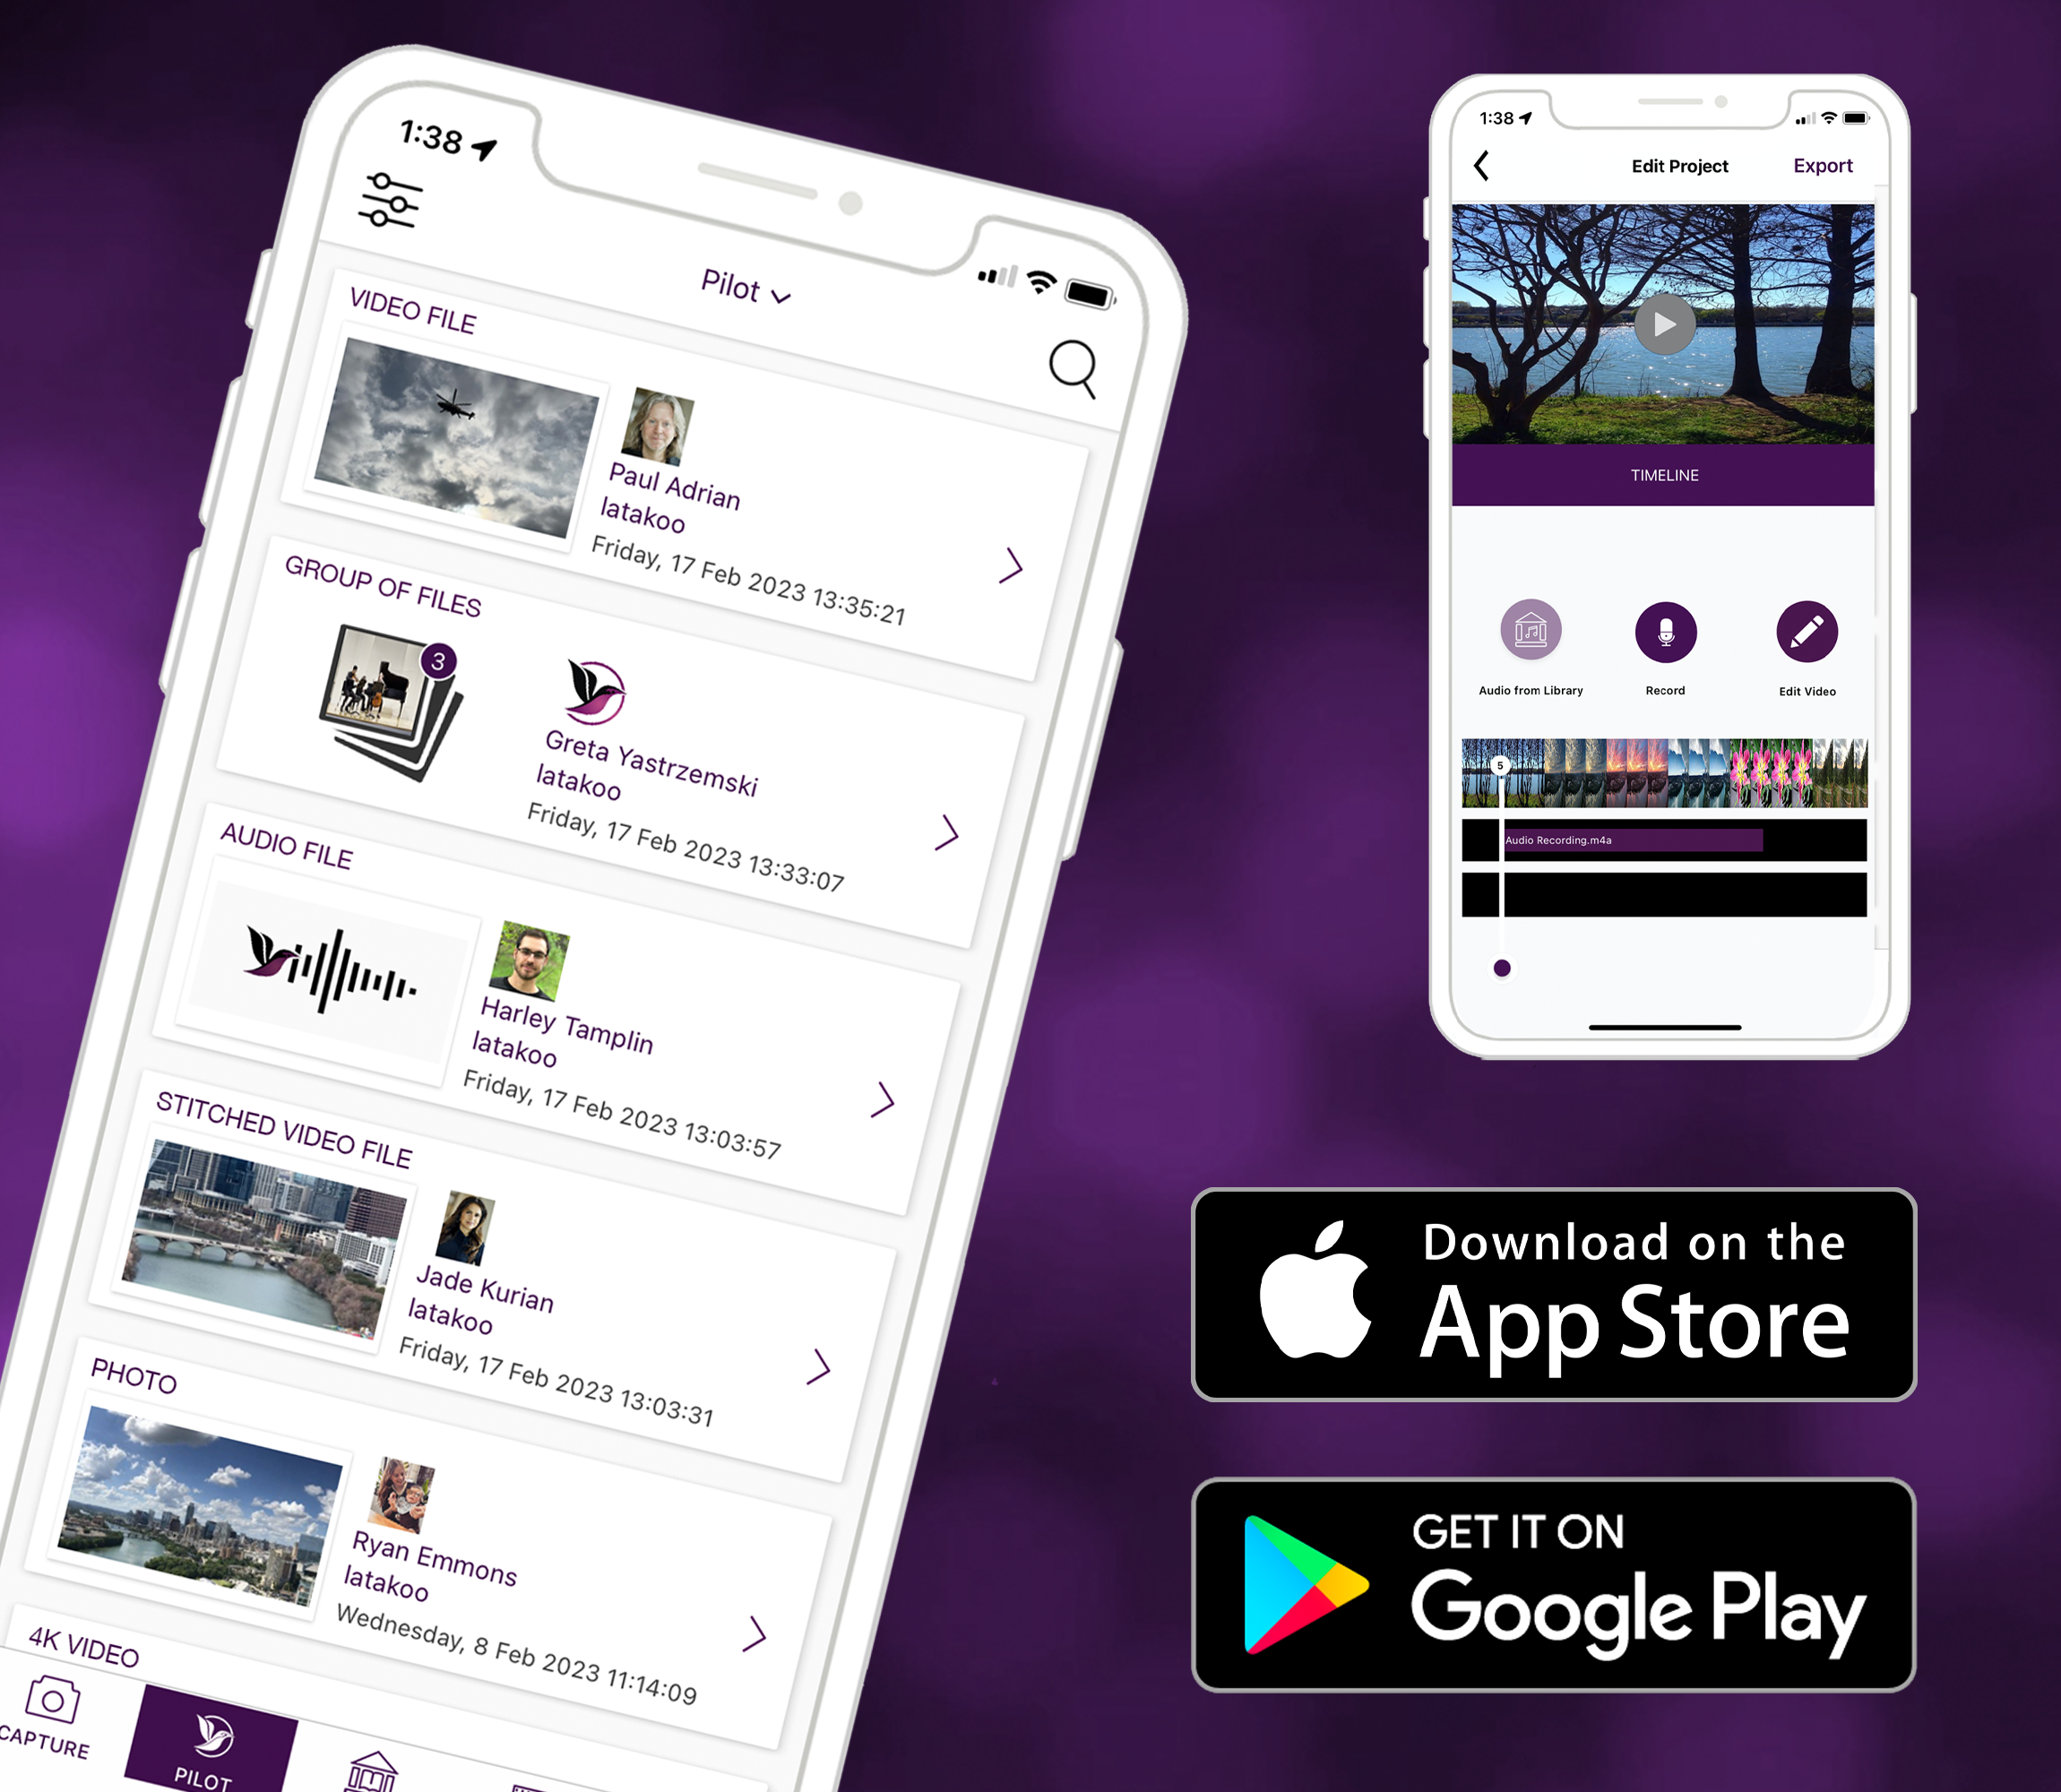
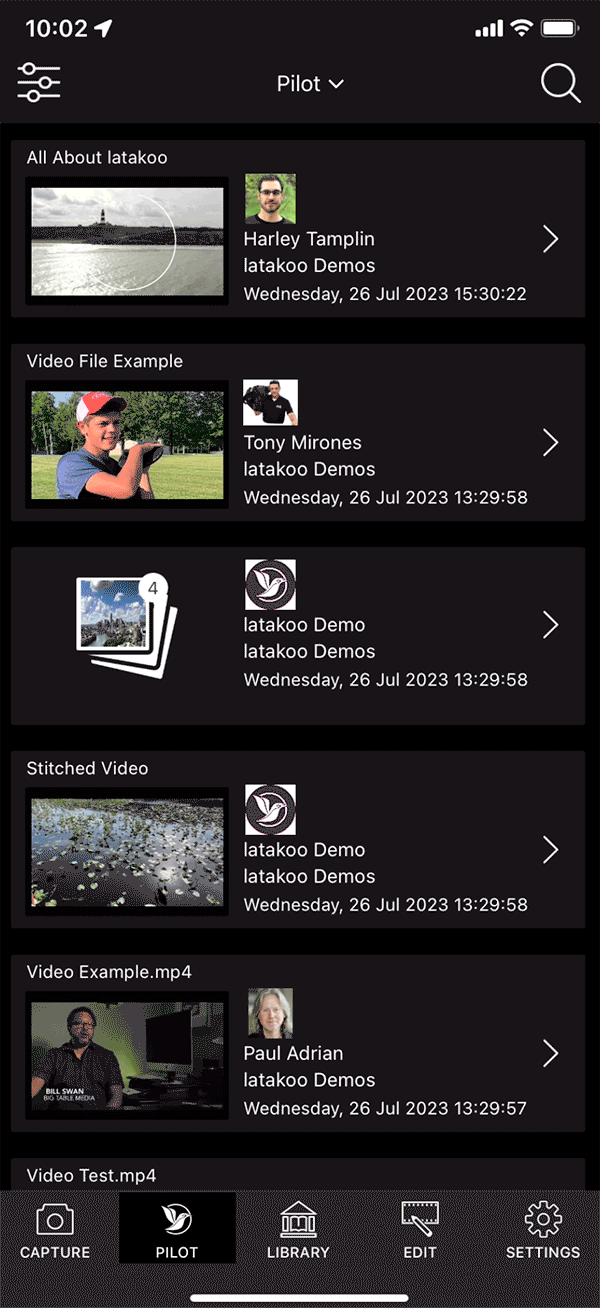
latakoo Pilot on the Mobile App
On mobile, you have access to all the functions of Pilot from latakoo.com, but in the app. View, comment, share, copy and download clips from the latakoo cloud.
Easily filter the Pilot view on your phone to isolate particular networks or zoom into the Pilot feed to see more details. Use search to locate files by uploader name, file name, metadata, transcription or keywords.
Download clips to share on social media or update metadata associated with a file.
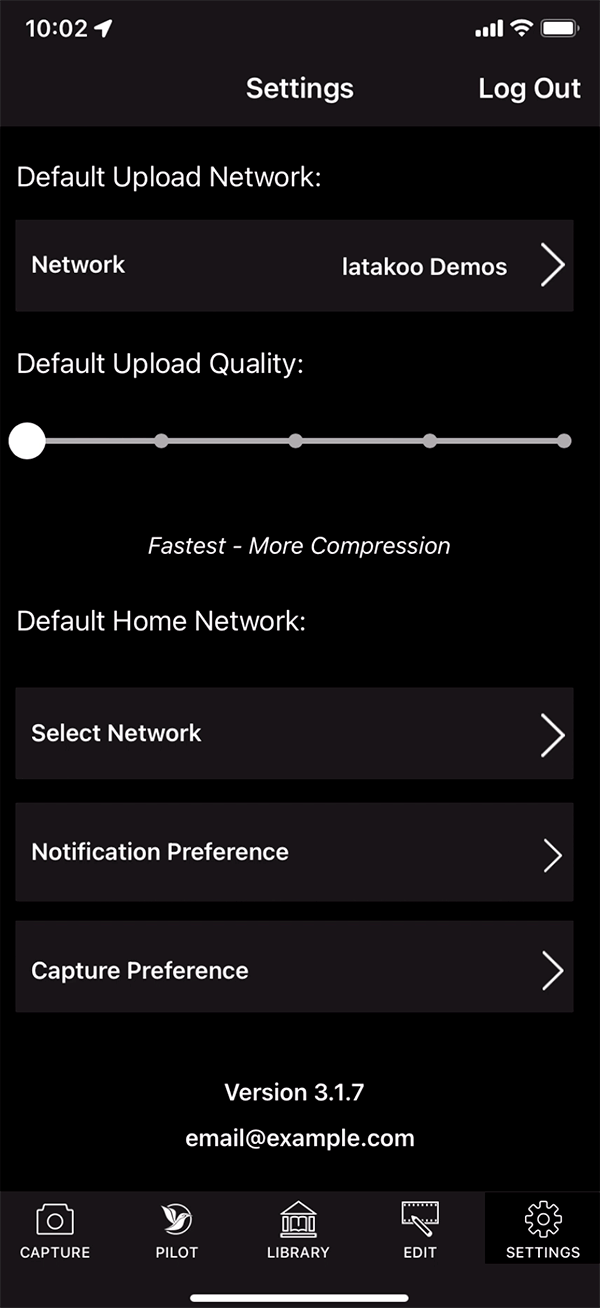
Default Settings
One of the first things you should do when you log in to the mobile application is set up your defaults. By clicking on the settings tab in the menu, you’ll be able to set up the default quality for your uploads, as well as the default destination network. Setting these defaults will populate them automatically for every upload.
You can also set your home networks. Select a list of favorite networks and when you filter by “home” those networks will populate your Pilot feed in the app.
Easily toggle on notifications for your own uploads or specific networks, and choose whether you would like the app to force horizontal recording for video.
Mobile Editor
With editor selected from the menu, select clips and images, build a project with the visual elements, then add audio track and voice over right from your mobile device.
Each clip in the sequence can be trimmed, each image can be cropped or enhanced. Export the project to your library and upload with the app. Great for combining videos and images that may be from different sources and are not suitable for stitched uploads.